
In this video we are going to show you how to create a one-page scrolling website in about 15 minutes. We are going to be using the awesome Divi 4 theme from elegant themes. Divi version 4 is absolutely awesome, they have introduced some great new features, and included a new theme builder that enables you to create custom header and footer sections that you can apply to any page or post on your website.

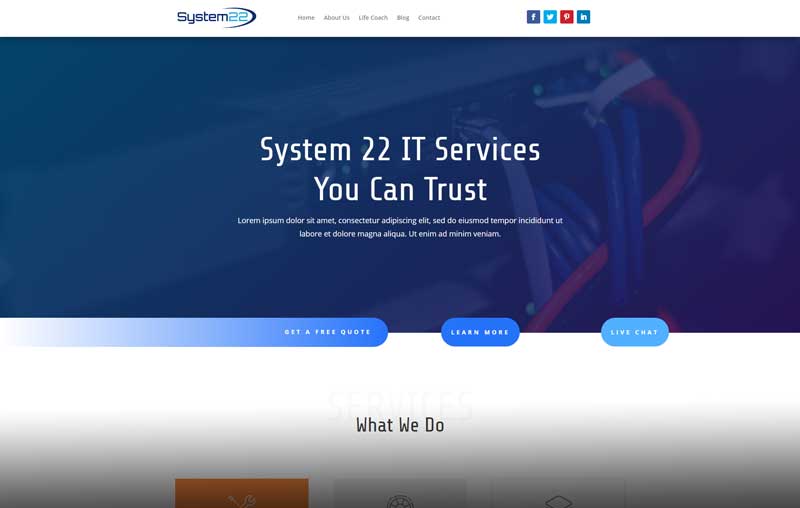
From the WordPress dashboard we are going to create a new page, then select the Divi Builder to build a page with. Once the builder is active, simply select builf from template, select the template that suits you best, there are over 1,000 to choose from in the library.
Once the desired template is selected for the one-page scrolling website, the next thing to do is to go about customizing the template using your personal content and images, this could not be easier as we demonstrate. Just put your cursor on the desired element that you wish to edit, you can type in the replacement text directly onto the site with the visual Builder, or you can type it into the content block of the module itself. You can also use a cut and paste option for text if it makes it easier for you, this can save a lot of time when you have a lot of content to replace on your one page scrolling site.
Images can be very easily replaced also, again this is done simply by clicking on the desired image on the site, going to the module that appears in the pop-up box, hit the trash icon and then the plus icon to add your new image, you just need to drag and drop your new image into the media library and select upload image, it is as easy as that.
If the template that you have chosen comes with a contact form, you can just click on the contact form module, go down to the email tab, enter the email address that you want the form details to be sent to, hit save and you are done.
For each section but you want to navigate to using the top menu, we need to insert a CSS ID. This is done by going to the section tab that you wish to navigate to. Once in the section tab, go over to the advanced tab, click on CSS ID and enter a unique section ID name. Each ID must have a different name. Repeat this process for each section on your one page scrolling site that you need to navigate to from the menu.
The only thing left to do now is to create the menu. Go to the WordPress dashboard, down to appearance and select menus. Once in the menu section hit the create new menu, give it a name and hits save. We now need to create the menu itself using custom links. Click on the custome link button, put in the name that you wish to be displayed in the menu. Then for the actual link put in a # followed by the unique CSS ID that you gave that particular section, for example #about. Repeat this process until you have links to all your sections. Save your menu and return to the dashboard.
For the last step in the process we just need to assign the menu to the primary navigation bar. From the dashboard go down to Divi and click on theme customizer, once the customized that is open, go down to menus, click on view all locations and set the primary menu to the menu that you have just created using the drop-down. When done hit the publish button and go back to the first page of the theme customizer. Go down to the tab that says home page settings, select the radio button that says a static page, then from the drop-down that appears, select the name of the page that you just created for your one page scrolling site. Again, hit publish and you are finished. Exit to the dashboard take a look at your site. You should have a one-page scrolling site with a navigation bar at the top. When you click on any of the navigation items, it should smoothly scroll down to the section that you have assigned to it. In the video we achieve this in about 15 minutes. The fantastic new Divi 4 theme really couldn’t make it any easier.
Try the Divi theme Here